Acoustic Guitar Neck Resets
Martin Mortise and Tenon Neck Joint
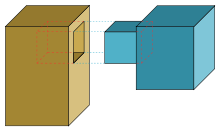
A mortise and tenon joint is a centuries old method for connecting two pieces of wood. The “mortise” is a hole or recess cut into a part which is designed to receive a corresponding projection referred to as the “tenon” on another component so as to join the two pieces together.
The Martin Guitar Company has been using this style of joint to secure the neck onto the body of their student and player grade model instruments for decades.
Unlike the Taylor Guitars NT Neck, or the Hybrid Neck Joints that we have previously discussed, where the neck’s heel is secured to the body entirely through the use of attachment bolts, the Martin style Mortise and tenon joint uses glue to assist with the connection. Since the heel is glued, full removal is required for any adjustment to the neck joint.
Performing A Neck Reset on a Martin Mortise and Tenon Joint
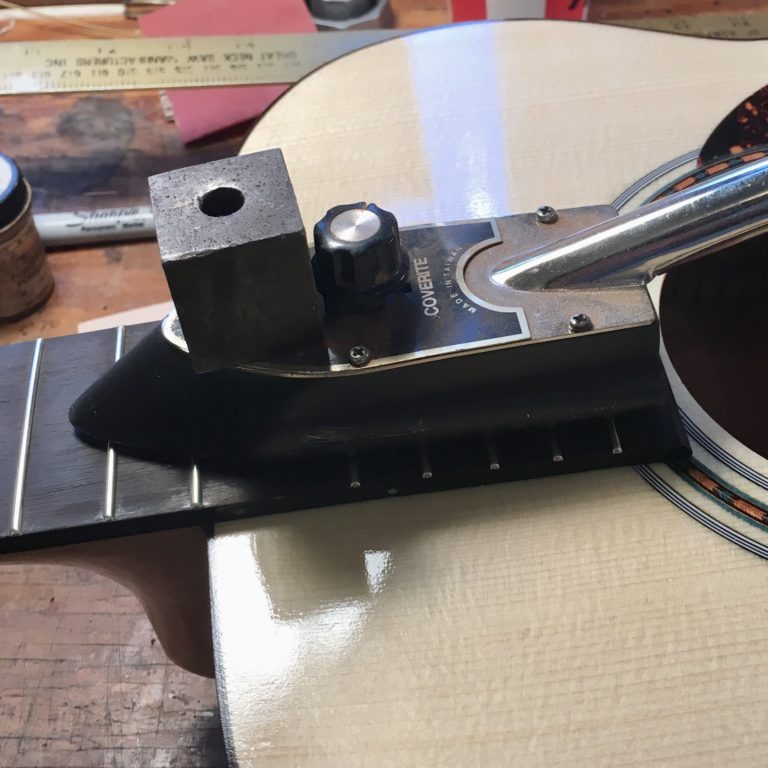
The term “fingerboard extension” refers to the portion of the fretboard that protrudes over the top of the guitar body. The first step in removing a glued in neck such as this is to separate the fingerboard extension from the body.
Careful application of heat softens the glue that joins them. Once sufficiently softened, we separate the joint using a thin spatula to carefully pry the two pieces of wood apart from one another without damaging either.
Once the extension has been loosened, the task of separating the mortise and tenon can begin.
First we remove a small attachment bolt from inside the guitar that helps to align the neck to the body and provides some additional support to the neck joint.
The tricky part about separating a glued neck from a guitar is in getting the required heat to the joint while causing as little collateral damage as possible to all of the delicate parts surrounding it, including the instruments finish and binding. Even in experienced hands, complications can and do arise.
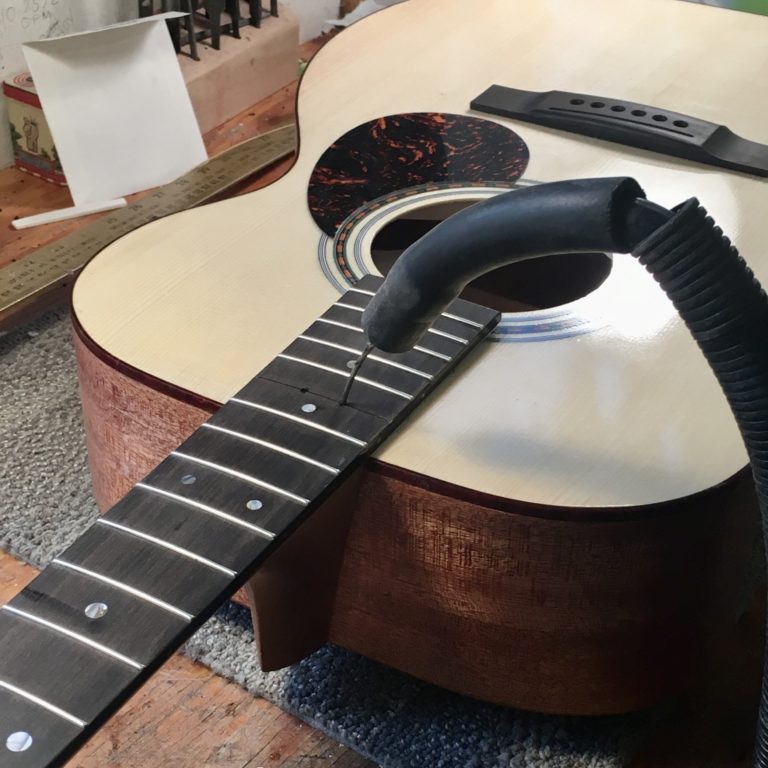
To get at the joint, we remove the fret that is located above it and drill down through the slot in the fingerboard. A pair of small holes allows the application of heat and water that will be used to soften the glue and release the bond. The holes can be touched up later and will not be visible once the fret is reinstalled.
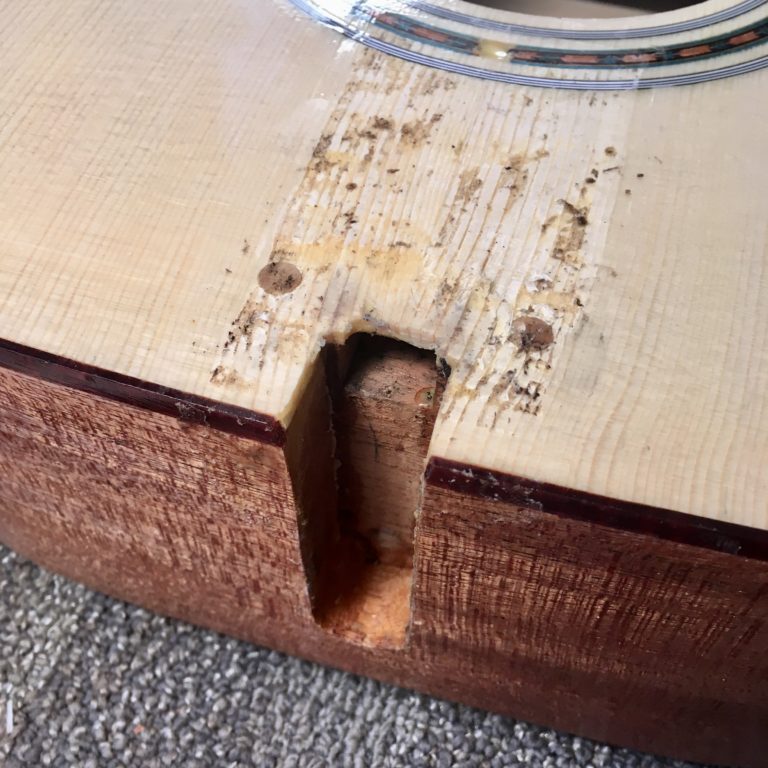
Once the neck is free, residual glue must be cleaned from the body and neck to prep the surfaces for refitting. In the photo you can see that the body has a recess. This is the mortise portion of the neck joint.
Since the trauma of removal causes the wood to swell, we typically set the instrument aside for at least 24 hours to allow the faces of the joint time to reaclimate before proceeding to refitting.
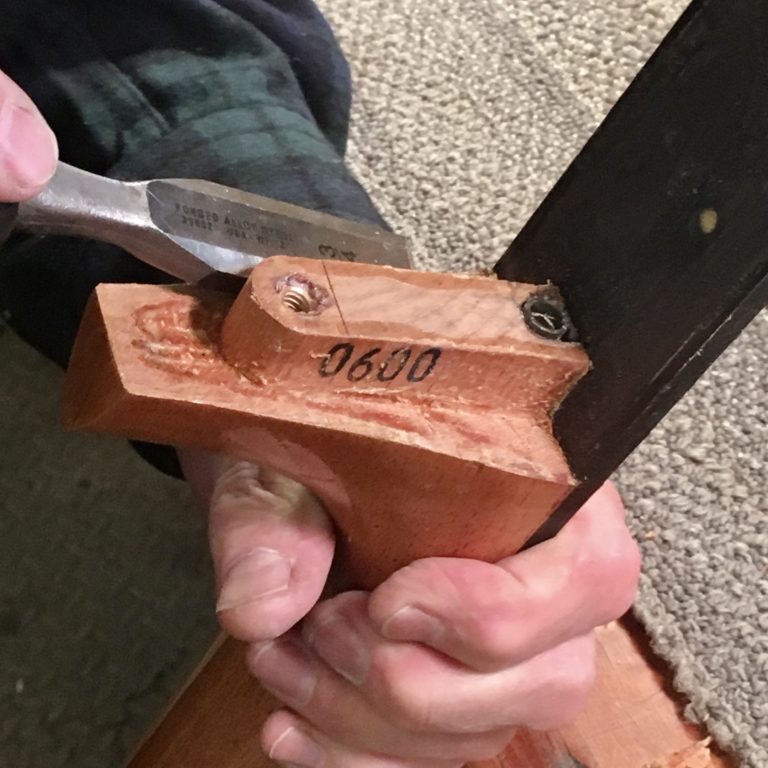
Here we are carving the cheeks of the neck heel to allow for the more delicate task of refitting the neck joint. We have previously described this process in a bit more detail in our article on hybrid neck joints.
In the photo you can also see that the neck has a protrusion that is shaped to match the recess in the body. This is the tenon portion of the joint.
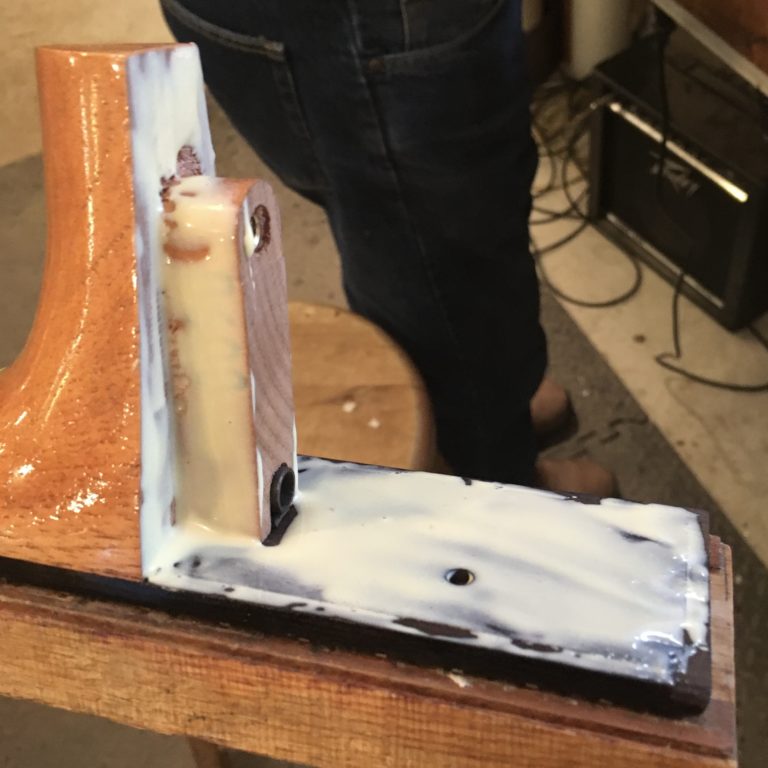
In the accompanying photo, glue has been applied and the neck is ready to be reattached. It should now be fairly clear that, though there is a bolt involved, this is most certainly a glued joint!
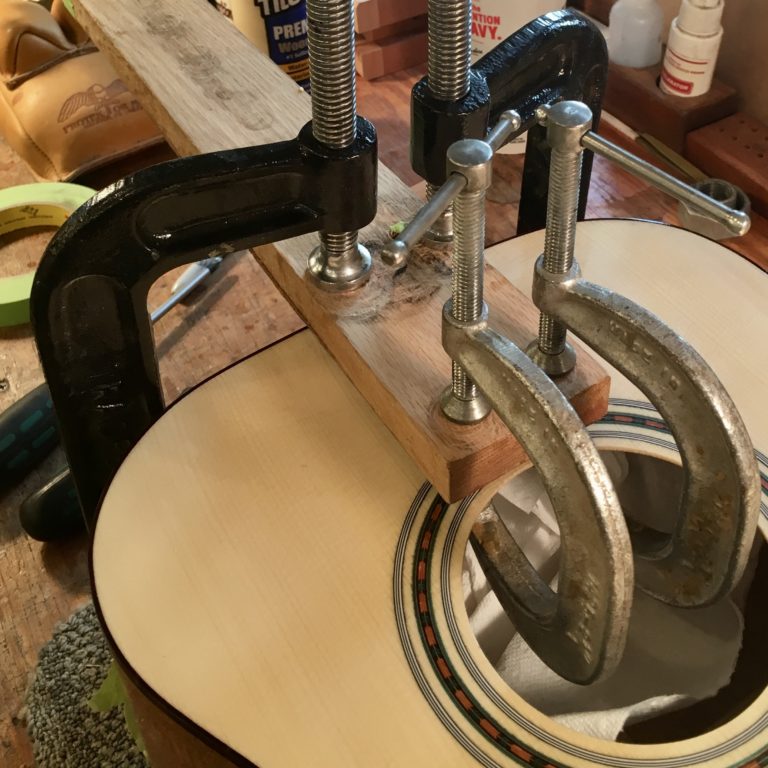
We clamp the neck in place overnight. The next morning we remove the clamps and, after dealing with the fret that was removed earlier in the repair, the instrument will be ready for the next phase of the job.
By the time most instruments are due for a neck reset, they will almost certainly benefit from additional. Vintage instruments in particular may also need work such as bracing repairs, fret work, nut, saddle, and of course a setup to dial in the instrument.

Erik Salomon - Calico Guitarworks Owner / Head Technician
Tech Talk articles are part of an ongoing effort to provide clear and detailed answers to common questions about guitar maintenance, modifications, and repairs.
While not intended as a step-by-step guide to servicing your own instrument, we hope that you will find value in the information provided.

Great Repairs Start With The Right Parts
Many of the parts mentioned in our blogs are available for purchase at:
GuitarRepairParts.com
Enter the code "TechTalk10" at checkout for 10% off your first order.
About Calico Guitarworks
Calico Guitarworks is the area’s premier destination for fretted musical instrument care and maintenance. Owned and managed by Erik Salomon, the shop is dedicated to providing quick, honest and reliable service. The staff at Calico Guitarworks has a combined 25+ years of professional guitar repair experience. Sharing the knowledge that we accumulate in this focused pursuit is at the core of what we do. Learn more About Calico Guitarworks, explore our Frequently Asked Questions, or Contact us with a specific request.

