Routing Guitar Bodies For Electronics Installation
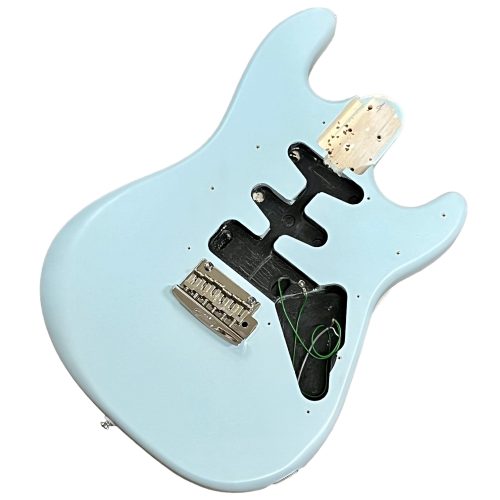
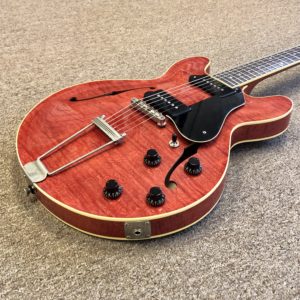
Electric guitars typically have openings in the body to accommodate the electronics. Manufacturers will typically remove only as much wood as is necessary to accommodate any factory variations of a given model. For example, the above guitar features 3 pickups in an HSS configuration, blade pickup selector switch, volume and tone controls. When modifying an instrument’s electronics to fit custom specifications, it is sometimes necessary to alter the existing cavities, or create new ones, to accommodate the new components
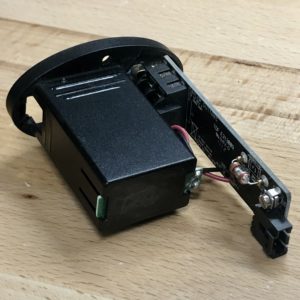
Battery Box Installation For Active Electronics
“Active electronics” are those that require a power source to operate. Common examples of active electronics are Fishman’s Fluence Series of pickups as well as many of the offerings from EMG. Certain types of tone controls and all on-board preamps are also actively powered. If no power source is required for functionality, the controls are said to be “passive”.
In guitars and basses, active electronics are typically powered by one or two 9-volt batteries. While the instrument’s pickups and other controls rarely need to be serviced by the user, a disposable battery will require comparatively frequent replacement. A battery box makes for a quick, hassle-free, battery change.
Our client requested some modifications to the stock controls of his guitar, including an EMG PA2 active boost control. With the flick of a toggle switch, this guitar will have an additional 20db of gain for instant overdrive.
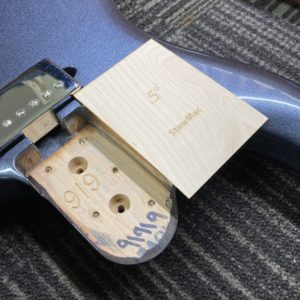
Given the tight confines of the existing control cavity, it is necessary to create an additional one to accommodate the 9 volt battery. The battery box will be mounted on the back of the body so that it is hidden from view when the guitar is being played.
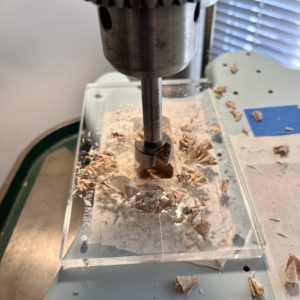
After plotting out where the box will go, a drill press is a great tool for bulk wood removal. We are able to drill out most of the required wood quickly, safely, and with minimal cleanup.
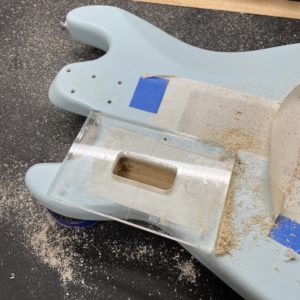
We then follow up with a router to finalize the new cavity to the precise measurements required for the battery box. A router is a powerful and potentially dangerous tool; It also spits out a lot of finely powdered dust.
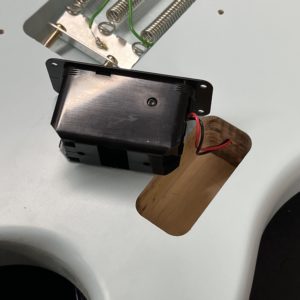
Once finished, we must join it to the main cavity where the rest of the controls are housed. Drilling a small hole between them allows us to connect the battery to the circuit.
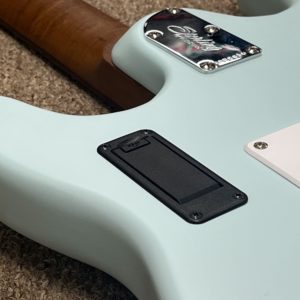
Four wood screws secure this battery box to the body. If treated gingerly, it should provide years of trouble free service.
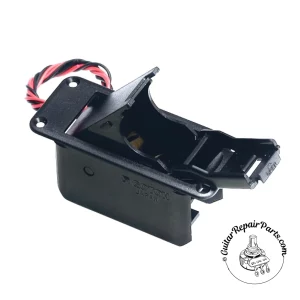
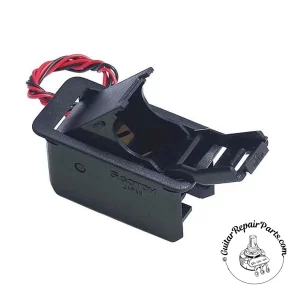
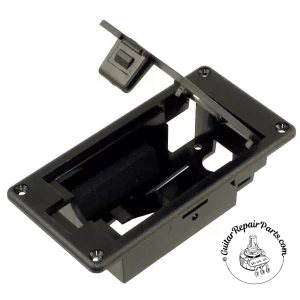
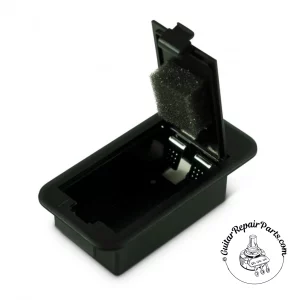
Common Battery Box Styles
Routing For Pickup Installation
Electric guitar pickups are available in a variety of different shapes and architectures. Changes to a pickup’s magnets and winding specs can have a profound impact on its tone. However, being that the structure determines the size/style of magnet and the number of coil windings that can be fit on a pickup bobbin, the profile of the pickup itself is a major tone defining factor that cannot be overlooked.
Sometimes an instrument’s body is not built to accept the client’s preferred pickup configuration. In these situations, routing may be necessary before the body will be ready to accept the new components.
Deepening A Pickup Cavity For Noiseless Pickups
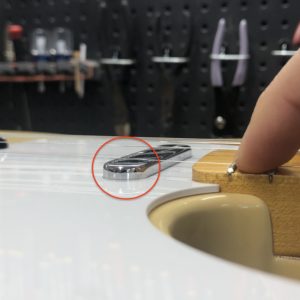
This instrument came to us after the client had already performed a pickup replacement. Unfortunately, when installed, the new pickup is not capable of being set low enough to avoid interfering with the strings as they are fretted in the upper register. We have to fix this issue before a proper setup can be performed.
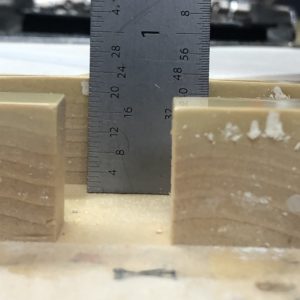
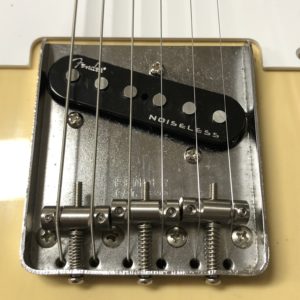
After removing the pickup, we measure that the cavity is approximately 23/32″ deep. This was plenty deep enough for the instrument’s original single coil style pickup.
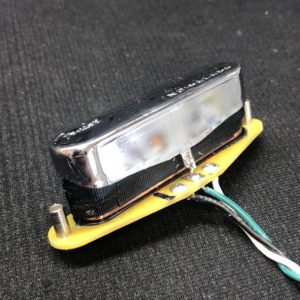
The Fender pickup model pictured is a “noiseless” model. Technically a type of humbucking pickup, it is made from two coils stacked on top of one another. As such, it is nearly twice as tall as a traditional single coil telecaster neck pickup.
Unfortunately, the body is simply not cut deep enough to properly accept this type of pickup.
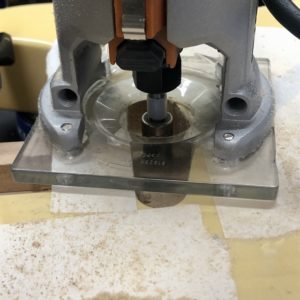
Using a router, we carefully remove wood from the bottom of the pickup cavity only. The added depth will allow the guitar body to accept the client’s preferred pickup type.
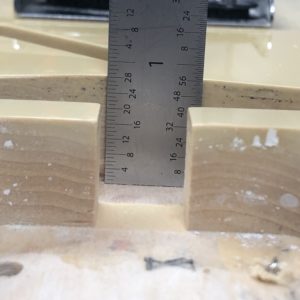
After routing, the pickup cavity is now 7/8″ deep. We believe that this will now accommodate full adjustment of the pickup to meet any desired spec.
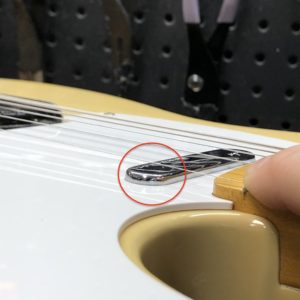
With the pickup reinstalled, we are now able to set the height exactly where we wanted to keep the instrument sounding good everywhere on the fretboard and there is a range of adjustment available should it ever be needed.
Widening A Pickup Cavity For Humbucking Pickups
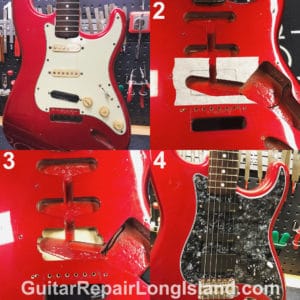
Oftentimes pickup types are categorized by the instrument model from which they originated. For example, a “Stratocaster pickup” brings to mind a pickup much like those shown in the top left corner of the photo (1).
In search of the perfect feel and tone, many players like to mix and match elements from different styles of instruments. Accommodating these requests sometimes requires adapting the instrument to fit new components of different specs.
The top right corner of the photo (2) shows that this instruments body had been cut to accommodate single coil “Stratocaster style” pickups. At the bottom left (3) we see that wood has been removed from the body in order to house the larger size of the humbucking pickup the client requested installed in the bridge position (4). Routing away the wood from the control cavity allowed the clients desired replacement pickups and pickguard to fit onto the instrument.
Routing A New Pickup Cavity
Adding a pickup position is sure to add new tonal possibilities to an instrument. The most common request we get is to add a middle pickup in a dual-humbucker guitar, creating a “Hum-Single-Hum” setup. Another example would be incorporating a bridge position Jazz Bass pickup to a Fender Precision Bass, creating the hybrid “P/J Bass”.
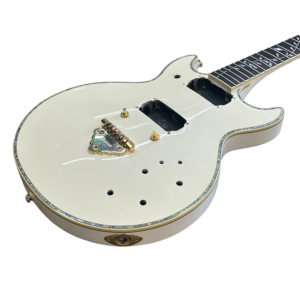
The owner of this Ibanez Artist Series guitar brought it in with the electronics already removed. He wished to add a middle pickup and simplify the control layout, omitting the mini switches and the tone control featured in the original wiring harness.
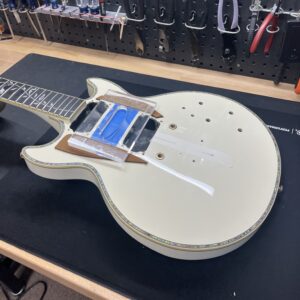
Creating a large cavity on the face of an otherwise perfectly well functioning instrument definitely has a bit of “pucker factor” to it.
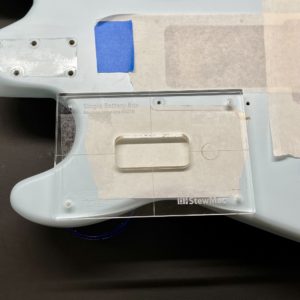
The crucial first step is to take care that the template is properly centered and well secured. You don’t get a second chance at putting the hole in the right spot!
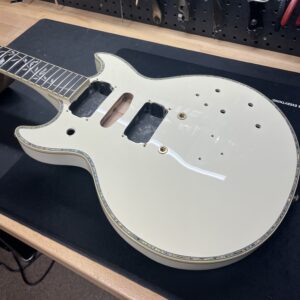
Once the cavity is routed, a channel must be drilled to allow the pickup wires to pass through to the control cavity, accessed on the rear of the instrument.
In this case, we drilled through the side of the new middle pickup cavity into the bridge pickup cavity, through which the wires can pass to the control cavity.
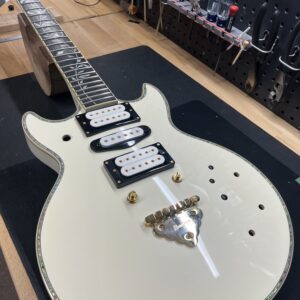
A test fit of the electronics confirms (hopefully) that everything fits as it should.
We can then shield the new cavity. It is especially important to make sure metal pickup mounting rings, such as the single coil pickup mounting ring pictured here, are properly grounded. If they are not, they may create noise whenever they are touched during play.
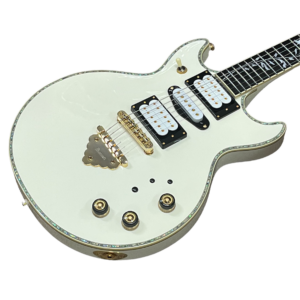
The completed project features a simple, yet versatile wiring harness with three independent volume controls and a three way toggle switch. The middle pickup is not attached to the switch, but can be rolled into any toggle switch position via the volume control.

Erik Salomon - Calico Guitarworks Owner / Head Technician
Tech Talk articles are part of an ongoing effort to provide clear and detailed answers to common questions about guitar maintenance, modifications, and repairs.
While not intended as a step-by-step guide to servicing your own instrument, we hope that you will find value in the information provided.

Great Repairs Start With The Right Parts
Many of the parts mentioned in our blogs are available for purchase at:
GuitarRepairParts.com
Enter the code "TechTalk10" at checkout for 10% off your first order.
About Calico Guitarworks
Calico Guitarworks is the area’s premier destination for fretted musical instrument care and maintenance. Owned and managed by Erik Salomon, the shop is dedicated to providing quick, honest and reliable service. The staff at Calico Guitarworks has a combined 25+ years of professional guitar repair experience. Sharing the knowledge that we accumulate in this focused pursuit is at the core of what we do. Learn more About Calico Guitarworks, explore our Frequently Asked Questions, or Contact us with a specific request.

